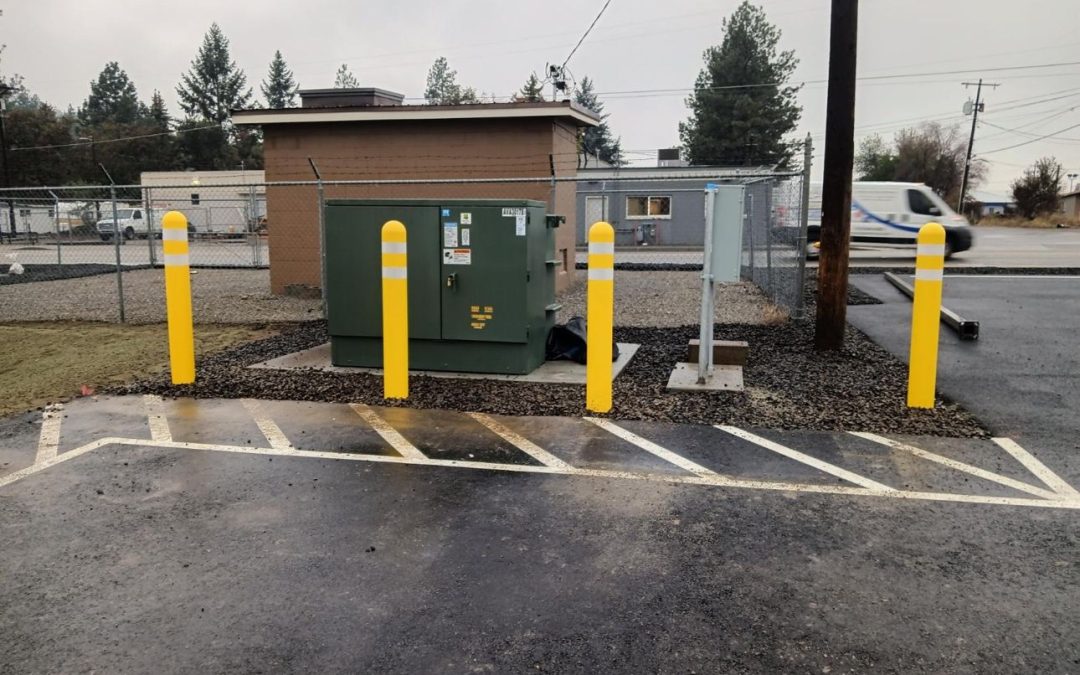
The streets of Melbourne are full of surprises. You might never thank the bollard on the corner for keeping you safe from a speeding car, but I sure do. Bollards – those sturdy little posts – quietly do a big job: protecting pedestrians, buildings, and public spaces.
If you’re a young professional in Melbourne looking to jazz up or protect your space, you might be thinking, “Where do I even start?” Trust me, you’re not alone.
Is a removable bollard worth the extra coin? Do you need steel or plastic? I’ve dug into all the answers with a Trusted Bollard Installer in Melbourne so you can get it right the first time.
Simply put, a bollard is a solid post – often made of steel, concrete, or tough plastic – that you sink into the ground. It might look unassuming, but it’s designed to stop cars from going where they shouldn’t. Think of bollards as your property’s silent bodyguards. They might even add a slick design flair to your property if you pick the right style.
Why would you splash out on bollards? Safety is the headline. You’re preventing cars from crashing into areas meant for people or assets. But there’s more: bollards can organise traffic flow (say goodbye to careless parking), help meet local regulations, and even give your insurance a thumbs up (yes, insurers like seeing safety measures). Plus, they can look great, which I know is a big tick for many of us.
Before you pick your post, think of its job. Will it always stay put, or do you need it to be removable for deliveries? A fixed bollard is bolted in and permanent, while a removable one (like a sleeve system) can be taken out when needed. We’ll cover these in types below, so you match the post to the purpose.
Materials matter too. Heavy-duty jobs often use steel – shiny stainless or powder-coated in a trendy colour. For lighter duties, a chunky plastic bollard (sometimes filled with water or sand) might do the trick. Don’t forget taste: timber or cast iron bollards can fit heritage designs, while bold-coloured plastic works for modern flair. Either way, there’s a style to suit.
Finally, let’s get real about the rules. State planning guidelines note that barriers (like bollards) should control vehicles without hindering pedestrian flow. That means no blocking footpath space or sightlines. Check with your local council (like the City of Melbourne) before you dig a hole. A quick permit or chat with council planners can save you fines and headaches down the track.
Types of Bollards and When to Use Them
Bollards come in several flavours. The main types I see are:
– Fixed Bollards: Permanently set in concrete. Great for long-term protection (think building corners or café seating areas). – Removable/Sleeve Bollards: You place them in a sleeve when needed and lock them in. Perfect for driveways or loading zones that need occasional vehicle access. – Retractable/Collapsible Bollards: These can be lowered into the ground (often with a key). Useful for property access control while staying out of sight when not in use. – Flexible/Spring-Loaded Bollards: These bend on impact and spring back up. Ideal for low-speed areas (like parking lots) because they cause minimal damage to vehicles and survive minor bumps.
To pick the right type, match it to your needs. For a storefront café, fixed or flexible bollards are common. For a garage entrance you drive through daily, a removable bollard might make sense. Retractable bollards shine in office parks for after-hours security.
Materials and Styles
Beyond type, material is key. Most high-impact bollards are steel (stainless or powder-coated). They stop cars dead and can be painted any colour. For softer needs or crowd control, plastic or rubber bollards (often hollow and filled with sand) can mark boundaries on a budget. Concrete bollards are ultra-strong but heavy and plain. Sometimes designers use timber or cast-iron bollards for heritage areas or parklands.
Here’s a quick comparison to jog your memory:
Bollard Type
Material
Typical Use
Notes
Fixed
Steel, Concrete
Permanent protection (shops, plazas)
Strongest; highly visible
Removable (Sleeve)
Steel, Plastic
Access control (driveways, events)
Requires sleeve; convenient access
Retractable
Stainless Steel
Regulated access (parking lots)
Sleek look; manual operation
Flexible
Plastic (spring)
Parking aisles, parks
Bends on impact; low maintenance
Installation Process Overview
Installing bollards isn’t just hammering posts; it’s about doing it right. Here’s the lowdown:
Site Prep: I mark the locations and check for underground utilities (always call “Dial Before You Dig” to be safe).
Dig and Set: For fixed bollards, we drill a hole (often 300–500mm wide) to the depth needed. We then set the post in concrete or secure it with a baseplate. For removable bollards, we install a sleeve in a concrete footing.
Finishing Touches: Once set, I often paint the bollards or add reflective tape. Some have rubber collars or caps for visibility.
Final Check: I double-check the alignment and make sure they’re highly visible from all angles. If it’s a cluster installation, I ensure spacing is consistent.
A pro install typically takes a few hours per bollard (including concrete curing). You can DIY to save costs if you’re handy, but I always say: get it right from the get-go. A loose bollard or misaligned post can cost more in repairs later.
Cost of Bollard Installation
Everyone wants the number. “How much will this bollard project set me back?” I get it. Costs vary, so here’s a ballpark:
Item
Cost Range (AUD)
Notes
Fixed steel bollard (supply)
$150 – $300+
Depends on height, diameter, finish
Removable bollard kit
$200 – $500
Includes post + sleeve system
Labour + installation (each)
$300 – $600
Concrete work and fixing per bollard
Flexible plastic bollard
$50 – $100
For low-impact use cases
So, installing one steel fixed bollard might run you $450 to $900 in Melbourne, all up. If you need multiple, tradespeople often offer a package deal, so ask for a quote on a group.
A few cost-saving tips: – Stick to standard sizes: Custom heights or fancy curves can blow up the price. – Batch your installs: If you’re doing several, get one call-out for the concrete drill; it’ll save time and often money. – Plan your layout: Fewer bollards with smart spacing (typically 1.2–1.5m apart) can protect just as well and cost less.
Where to Use Bollards
Bollards are everywhere in Australia. Here are the hot spots:
City Streets and Pedestrian Zones: To keep cars out of walkways, malls, and outdoor dining areas.
Home Driveways: Many Melburnians use removable bollards to prevent double parking or unwanted access to their driveways.
Car Parks and Garages: Bollards protect storefronts, structural columns, and walls. You’ll see flexible bollards lining indoor lots.
Shopfronts and ATMs: A lot of shops install bollards against ram-raids. I’ve fitted sturdy posts in front of ATMs and storefronts to fend off smash-and-grabs.
Parks and Heritage Areas: In places with a historic vibe, cast-iron or timber bollards keep cars out without looking out of place.
Industrial Sites: Steel bollards safeguard machinery and buildings from forklifts and trucks.
Each setting has its style. For example, we installed pastel-coloured bollards for a local café, so they matched the fun branding. In a heritage zone, black iron posts blend right in. There’s no one-size-fits-all – that’s part of the fun.
Safety, Standards and Regulations
Time to talk rules. In Melbourne (and statewide), bollards must be safe. The urban design guide says locate bollards to allow free pedestrian movement while controlling vehicles. In short:
– Keep walkways clear: Don’t block footpaths or ramps. Leave at least 1.5m passage. – Be visible: I use reflective tape or bright paint so drivers see the bollard day and night. Some folks even add lights or reflective studs. – Accessible design: Vision-impaired people should be warned of a bollard’s presence (tactile ground surface indicators can help). – Get permissions: If your bollard touches any public asset (footpath, kerb, utilities), you likely need a permit. Even on private land, check any building codes that might apply.
Following these simple checks makes sure your installation is solid, legal, and truly protective.
Conclusion
Installing bollards might not sound glamorous, but it’s a savvy move for safety and style. We’ve covered how to pick the right type, material, and installation method for your Melbourne property. Whether you need a simple driveway post or a row of city street bollards, I hope you feel ready to make an informed choice.
Ready to lock it down? Measure your space, list what you need (fixed vs removable, height, etc.), and get a couple of quotes. A quick chat with a professional Bollard Installer can clear up any remaining doubts. Do it right, and you’ll drive away with total peace of mind (pun intended).
Frequently Asked Questions
Can I install a bollard myself?
If you’re handy, yes – for small jobs you can DIY by following safety steps (check underground services, use proper concrete mix). But for heavy-duty jobs or public areas, I recommend a licensed installer.
How deep should a bollard go?
It varies by height, but a good rule is bury about one-third of its height. For example, a 1200mm post often has ~400mm in concrete below ground.
Do I need council approval for bollards?
For private driveways and yards, usually not. For public spaces (footpaths, parks, heritage streets) you almost certainly need permission, so check with City of Melbourne or Vic Roads.
What’s the ideal spacing between bollards?
To let people pass easily (including wheelchairs), 1.2–1.5 metres is common. Always leave a clear 1.5m path, or a minimum 1.2m, between them.
Should bollards be lit or painted?
If they’re on a street or in a parking lot, definitely add reflectors or lights. Solar-powered bollard lights are popular for pathways. For dark corners, I sometimes use bollards with built-in LEDs.
What if a vehicle hits a bollard?
Well-installed steel bollards withstand a lot, but a heavy hit can bend or break one. Flexible bollards flex on impact and keep their shape. After a big hit, you’ll inspect and repair as needed (better it hit the bollard than your shop front, right?).
Can bollards improve property value?
Not directly, but they improve safety and compliance, which buyers appreciate. A well-protected space feels more professional and secure, which is a subtle selling point.
Melbourne runs on coffee, deadlines, and the quiet confidence that your drill bit won’t hit something expensive. The moment you punch into a slab blind, though, you gamble with rebar, live conduits, and post-tension cables that sit there like hidden tripwires.
I’ve watched great projects turn into stress-fests because someone treated concrete like it’s just “solid grey stuff”. One wrong core can spark shutdowns, repairs, and awkward phone calls that start with, “So… we might’ve clipped a cable.”
If you want a smarter start, I point people to a Professional Concrete XRay Service in Melbourne before any cutting, coring, or drilling. You trade a bit of prep time for clarity, and you keep the whole job moving like a well-planned tram run.
Here’s the truth most plans won’t tell you: Melbourne buildings love surprises. Fit-outs stack new services over old ones, renovations “move” pipes, and as-built drawings can miss changes from ten years (or ten tenants) ago. So when you drill, you often drill into history.
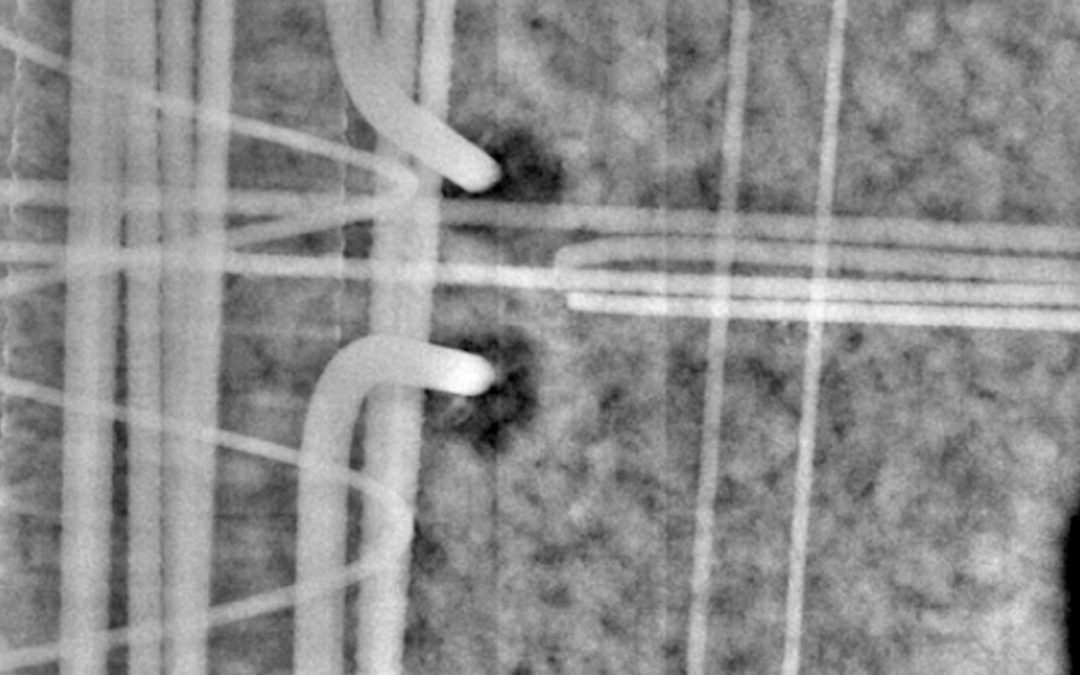
Concrete XRay lets me “see” that history. I use it to capture a crisp picture of what sits inside the concrete steel reinforcement, conduits, and voids so you can choose drilling points with confidence instead of vibes.
Now, I won’t pretend X-ray imaging fits every job. I reach for it when I need high-detail answers, when the slab holds dense reinforcement, or when radar scans feel like reading tea leaves during a Melbourne downpour. When I need certainty, I choose the method that gives me a clean, readable image.
Let’s talk about the damage domino, because it rarely stops at “oops”. If you hit a live electrical conduit, you trigger safety risks, outages, and an instant schedule wobble. If you nick a water line, you add water damage and cleanup to your to-do list congrats, you just invented an indoor pool.
And if you strike a post-tension tendon, you can invite bigger trouble. Those tendons store serious force, and a risky cut can lead you straight into engineering reviews, specialist repairs, and a very grumpy superintendent with a stopwatch.
Because Concrete XRay involves radiation, I treat safety like the main event, not an afterthought. In Victoria, the regulator licenses people who manage radiation practices, so I always plan scans the professional way and follow the rules outlined on the Victorian Government’s radiation safety informationpage.
What I mean when I say “Concrete XRay”
I run Concrete XRay like a photo shoot for your slab. I place an X-ray source on one side, a detector (film or a digital plate) on the other side, and I capture a radiograph that shows density changes. Dense materials show up clearly, so you can map steel and spot services with less guesswork.
The real reason X-ray scanning saves money
You don’t pay for the scan because you love fancy gear. You pay for it because you hate rework.
When I scan first, you:
– avoid hitting reinforcement that keeps the slab doing its job
– protect electrical and hydraulic services that keep the building alive
– stop “small mistakes” from snowballing into delays, variation claims, and rescheduling trades
Where I see Concrete XRay shine around Melbourne
I lean on radiography in places where precision matters and surprises cost more: commercial fit-outs in the CBD/Southbank, hospitals and labs, packed plant rooms, and refurb jobs where nobody trusts the drawings.
Concrete XRay vs other concrete scanning methods
I like tools that match the problem. Some days I want speed. Other days I want clarity. Sometimes I want both, and I layer methods like a good outfit.
Method
What I use it for
What it finds well
What it struggles with
How it affects your site
Concrete XRay
High-precision imaging when I can access both sides
Rebar patterns, dense steel, overlaps, some voids
Jobs where I can’t reach the underside; tight sites where I can’t control an exclusion zone
Slower and more controlled
GPR (ground-penetrating radar)
Fast scanning across bigger areas
Metal and non-metal targets, plastic conduits, general mapping
Noisy data in very dense reinforcement; interpretation can vary
Fast with minimal disruption
Cover meter / induced-current locator
Quick checks on cover and steel
Rebar location and cover depth
Non-metal services and deeper targets
Very low disruption
EMI / cable locator
Service tracing (especially metallic)
Metallic conduits and some live services
Plastic pipes and complex layered slabs
Low to medium disruption
If you’re thinking, “So which one should I book?” I’ll give you the simplest rule I know: use Concrete XRay when you need the sharpest picture and you can access both sides; use radar when you need speed, coverage, or slab-on-ground scanning.
The damage domino: what “one wrong hole” can turn into
When you drill blind, you don’t just risk one item—you risk the chain reaction.
What you hit
How often I see it on busy sites
How bad it gets
Why it hurts (fast)
Rebar
Medium
Medium
You weaken reinforcement and relocate holes
Electrical conduit
Low to medium
High
You risk shock, shutdowns, rework, and compliance headaches
Water or hydraulic line
Low
High
You flood, you dry, you repair, you argue about who pays
Post-tension cable
Low
Very high
You trigger structural checks and specialist repair work
How I run a Concrete XRay job
I start by asking what you plan to install: core size, fixing depth, and “must-hit” locations. Then I confirm access on both sides of the slab, set up safety controls, clear the area for each exposure, capture the images, and mark safe drilling zones on the surface.
A tiny checklist that prevents big, expensive drama
You can make scanning even more useful with a few simple moves:
– send drawings, even if they feel sketchy (they still help me plan)
– tell me the exact penetrations you want (diameter and location)
– keep the underside accessible where you can (that keeps radiography on the table)
– run a quick “permit to core” sign-off so one person owns the call
– treat marked zones like gospel, not suggestions
Conclusion
Concrete XRay gives you a clear look inside the slab, so you stop guessing and start drilling with confidence. When you scan first, you protect cables, pipes, and reinforcement, you keep your program steady, and you avoid the kind of damage that makes grown adults swear in the site shed.
If you’ve got coring, cutting, or drilling coming up in Melbourne, book a Concrete XRay scan before you touch the concrete. Share your penetration plan, lock in a time, and I’ll help you keep the job smooth, safe, and proudly drama-free.
Frequently Asked Questions
Do I always need Concrete XRay, or can I use radar?
I choose Concrete XRay when I need the clearest detail and I can access both sides of the slab. I choose radar when I need speed, broader coverage, or slab-on-ground scanning.
Does X-ray scanning find plastic conduits?
It can, but results vary with thickness and layout. When plastic services matter, I often pair scanning methods so you don’t guess.
How accurate does X-ray scanning get for locating rebar and conduits?
It gives very clear images of dense items, and that clarity helps you place cores and fixings with confidence.
How long does a scan take?
Time depends on access, thickness, and how many exposures you need.
Do I need to clear the area during scanning?
Yes. I set up a controlled exclusion zone during each exposure, then I reopen the site once I finish that shot.
Can scanning replace as-built drawings?
No. I use drawings as a starting point, then I confirm the reality on site and mark safe drilling zones you can trust.
Can you scan a slab-on-ground with X-ray scanning?
Radiography needs access to both sides, so slab-on-ground makes it tough. I usually switch to other concrete scanning methods for those slabs.
What should I do before the scanner arrives?
Clear the work zone, confirm access below if you have it, and share any drawings and penetration locations.
How much does X-ray scanning cost in Melbourne?
Costs change with access, area, and safety setup. I recommend a site-specific quote so you pay for the right scope.
Ever drilled into your concrete only to hear a dreaded clank? That surprise rebar or buried pipe could turn a small job into a big headache, especially in a city like Melbourne where old buildings mix with new wiring. Think of slab scanning as an X-ray for your floor – giving you eyes inside the concrete.
In this guide, I’ll walk you through everything you need to know about slab scanning, from how it works to what it costs in Melbourne, and why it’s absolutely worth it.
What is Slab Scanning?
Slab scanning (or concrete scanning) is a non-destructive test that uses advanced detectors to reveal what’s hidden inside a concrete slab before cutting or drilling. It lets you spot steel rebars, post-tension cables, electrical conduits, plumbing pipes or voids buried in the concrete. In practice, we sweep the scanner over the surface and it creates a map of any embedded objects. It’s basically X-ray vision for construction.
Why bother? Safety first. Slab scanning spots live wires, gas lines or hidden steel before you start work, protecting your crew (and your wallet) from accidents and big repair bills. It also keeps the project moving: knowing exactly where to cut (and where not to) avoids costly delays.
I’ve seen it save jobs in Melbourne for example, on one renovation a scan flagged a hidden water pipe so the crew didn’t flood the site. Slab scanning turns uncertainty into certainty. I always call a Professional Slab Scanning Service in Melbourne to do it right. The experts mark every hidden bar, cable or pipe so I can drill and cut with total confidence and zero nasty surprises.
How Slab Scanning Works
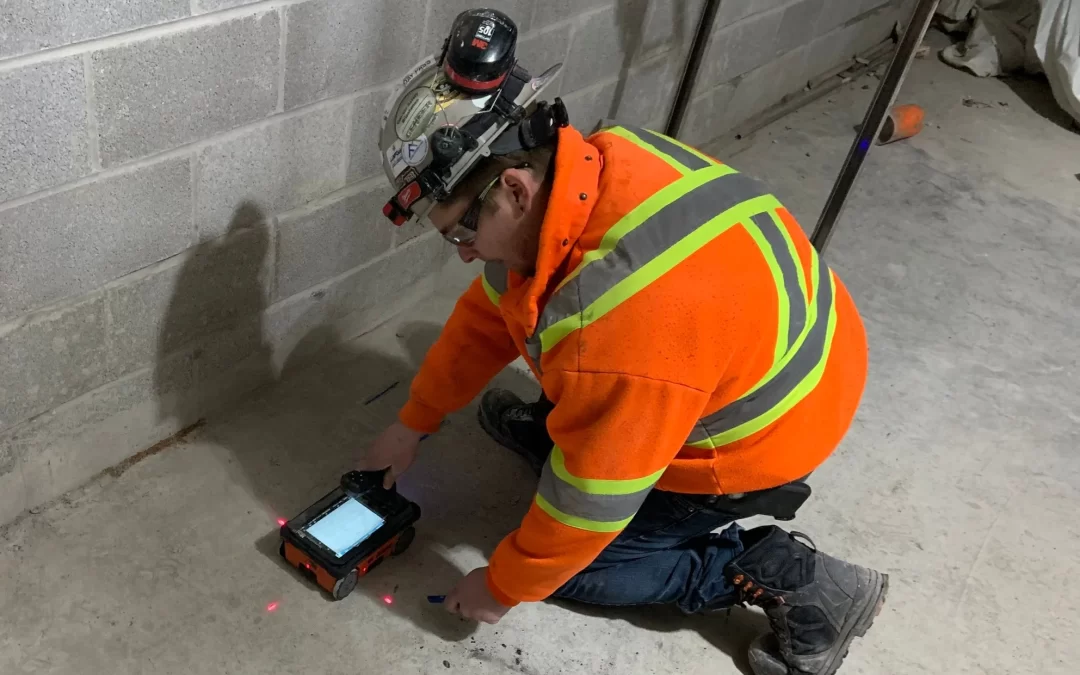
Ground-Penetrating Radar (GPR) is the main technique. A GPR unit sends radio pulses into the slab and listens for echoes. When the waves hit something solid, they bounce back and the machine plots an image of what’s inside. Think sonar for concrete. It’s fast, non-invasive and safe – no radiation or drilling needed.
Other common scanning tools include:
Ground-Penetrating Radar (GPR): Sends radio waves into the slab and maps what’s down there (rebar, voids, pipes, etc.). No radiation – just pulses and echoes.
Magnetic / Electromagnetic Locators: Handheld devices that find metal by sensing its magnetic or electrical field. They quickly confirm steel reinforcements or cables that GPR detects.
Concrete X-Ray: Uses X-rays to create a detailed image of the slab’s interior. It shows everything crystal-clear, but requires strict safety gear and a licensed operator, so it’s only used for very high-risk or high-precision work.
Regardless of the method, the key is: the slab stays intact. You get a full picture of hidden hazards without cutting any concrete.
Cost of Slab Scanning in Melbourne
How much does a slab scan cost in Melbourne? It varies, but expect somewhere around $800–$1,200+ for a small-to-medium area (like a couple of rooms). This typically covers the scanner’s time and a basic site report.
Most companies charge a call-out fee (around $300–$400) plus an hourly rate (often about $200–$250/hr). For example, one Melbourne provider lists roughly a $350 call-out fee, $225/hr thereafter, and about $200 for the scan report.
Service Component
Cost (AUD, approx.)
Call-out fee
$350 + GST
Hourly rate
$225 + GST
Full 8-hour day rate
$1,200 + GST
Slab scan report
$200 + GST
Of course, every job is different. A larger or thicker slab, congested reinforcement, or a rush service can push the price up (more time or equipment needed). For very large slabs or industrial projects, total scanning costs can climb into the low thousands – but that’s still a small share of any project budget.
Remember: spending a few hundred or a couple thousand on a scan can prevent a single mistake (like hitting a water pipe or a power cable) that might cost tens of thousands. It’s cheap insurance.
Benefits of Slab Scanning
Slab scanning delivers major upside for any concrete project. Here’s why it’s a game-changer:
Safety: Avoid hidden utilities or steel and keep everyone safe.
Cost Savings: Prevent expensive damage or delays. A scan costs far less than a major repair.
Efficiency: Work faster by knowing exactly where you can cut or drill. No wasted time or guesswork.
Design Insight: Get precise info on slab thickness and reinforcement for better planning.
Regulatory Compliance: Demonstrate you took precautions. A scan report shows you identified hazards ahead of time, which helps with safety inspections and insurance.
Peace of Mind: You’ll know you’ve done your due diligence. No surprises, and no awkward insurance claims.
Think of it like a GPS for your drill – it guides your tools safely through the slab.
Safety and Regulations
Slab scanning itself isn’t mandated by law, but it ties directly into safety regulations. Any concrete cutting or excavation must have risks controlled, and inspectors expect buried services to be located first. In fact, Safe Work Australia’s Excavation Code of Practice explicitly recommends using tools (like GPR or cable locators) to identify underground utilities before digging.
Using a professional scan means you’ve covered your bases – you’ll mark every hazard and have a report to prove you followed safety guidelines. After all, hitting a live cable or pipe can mean huge fines, downtime or injury; in that light, a slab scan is cheap insurance.
Conclusion
I know slab scanning adds a step (and a small cost) before work, but consider it quality insurance. In my experience, projects always run smoother and safer when the team knows what’s in the slab upfront. If you’re drilling, coring or cutting concrete in Melbourne, investing in a slab scan is one of the smartest moves you can make.
Think of it as cheap insurance: the money saved from avoiding mistakes and the safety benefits far outweigh the cost. Ready to drill with confidence? Reach out to a qualified slab scanning provider and map out hidden dangers before you start your next job.
FAQs
What is slab scanning?
It’s a service that uses scanning equipment (like GPR) to detect hidden objects (rebar, cables, pipes, etc.) inside a concrete slab without cutting it.
Why do I need slab scanning?
To avoid accidents and costly damages. A scan shows exactly where it’s safe to cut or drill. Hitting a hidden utility or reinforcement can cause big delays and repairs.
How long does it take?
Typically a couple of hours for a normal room-sized area. The technician scans the slab and marks any findings on the surface. Often you’ll have results by the end of the day.
Is slab scanning safe?
Absolutely. Modern scanning (especially GPR) uses harmless radio waves. It’s much safer than cutting blindly. The only scanning method that uses radiation is concrete X-ray, and that’s only used under strict controls.
How much does it cost in Melbourne?
Around $800–$1,200 for a medium-size area, plus any call-out or reporting fees. Exact quotes depend on slab size and complexity. It’s a small investment compared to the cost of potential mistakes.
Can I skip slab scanning and just be careful?
I wouldn’t risk it. You can’t see underground utilities with the naked eye, and even building plans can be out of date. Skipping the scan is like driving blind: just not worth it.
What equipment is used in slab scanning?
The most common tool is Ground-Penetrating Radar (GPR). Technicians may also use electromagnetic or magnetic locators to find metal reinforcement. Concrete X-ray machines are used in special cases for extra detail.
Who provides slab scanning services?
Many concrete or demolition contractors and specialist companies offer it. Look for experienced operators with up-to-date GPR gear and safety certifications. In Melbourne, it’s a standard part of any major renovation or construction project.